After forever the forge is back in action. Trying to find a trip to Denmark/Germany. no customs just what is on here is available for now. Not back to knives yet. Hammer arm is a bit rusty yet.
I have the largest selection of made to order items yet and tons of in stock items! Please check out my Ebay and Etsy.com for the new items including some items on Ebay not available on Etsy.
More new images will be posted soon. In the mean time I will talk about my recent success with forge welding carbon steel in a coal forge. After many attempts with no success or unpredictable success I decided the other night to try 2 basic techniques and just see what happened. On the advice of a German smith I setup a miniature anvil right next to the fire so almost no distance existed between heating and hammering. Normally a distance of about 5 feet . The next thing was to change my attitude toward the process. I simply relaxed and worked gently and slowly instead of working fast and trying to get the welds done before the heat lowered.
Process so far:
I took a piece of general 1018 1″ x 1/8 stock and began heating it on my forge until orange and wire brushed it between heats.
I started using borax at the beginning before folding.
Bent the steel on to itself 1 time.
Fluxed and heated to Yellow/orange working it very gently on the anvil.
Heat and hammer gently morphing the two pieces together.
Tap flat-tap on sides.
Fluxing between each heat.
Wire brushing before hammering.
And as easy as if I had done it my whole life the first 2 layers were nicely welded together into a solid piece. After this I folded it one more time making a total of 3 layers and slowly gently tapped it until it fully welded using the same process over and over again. The difference is patience, distance between fire and anvil and the smooth gentle hammering. Now that I have at least repeated work I can begin working toward doing Swedish laminated steel which is putting a piece of HC steel between LC steel to create a perfectly alloyed tool with strong durable spine and hard HC edge. I greatly look forward to these experiments.
A pattern in the 3 layer blade appeared after I acid etched it, it is very interesting to see how the carbon got distributed. the strength of the blade when quenched increased amazingly from its original form but many mistakes also showed in cracked or partial welds. I kept the piece as a reference and will post photos soon. A good reminder of what needs to be corrected.
First off before get into explaining this item the original place I saw it was http://www.youtube.com/user/captjeff78/videos and from a few other concepts of static knife edging jigs used in professional factories. I am not associated with Captjeff78 personally but he deserves credit for this great design and honestly the difference maker in my knives going forward. Youtube and many of these great knife video makers are adding valuable if not invaluable hands on info to the greater amateur knife making community so thank you to everyone in the education field regarding Blacksmith and knife making based information. I myself run this blog to help anyone who may be going through the head scratching parts of making knives and doing forge work.
Now onto the Visbjorn Scandi Edge jig!
Forgive the bad graphics but this item is rude, crude and ready to use!
The jig above I use to make Scandinavian Edge style knives to great effect! I can make the same knife with any depth of hollow ground I want and they are basically ready to use right off the sander. I use 80 grit to remove material and 120 to finish my knife edge. I leave the steel at factory finish to creat a more earthy realistic feel that I prefer. I then 3500 RPM wire brush after all heat treating. Sometimes it is nice to hit the master bevel one more time to brighten it up after heat treating. I use a Ryobi 4″-36″ belt sander and generic 1″ by 30″ sander.I prefer using fresh factory made 1075/1080 High carbon steel. Please refer to my Trade off steel post for more info on how to get 1080 and other alloys.
As the graphics show, it is rather self explaining how to make and use this item. Simply creating a secure static for the knife to sit on and move it slowly but firmly across the belt until the desired edge is created. I modified mine to be more adjustable and use the large clamp as a handle which can be a pain but creates a more flexible tool if holes are not desired on your tang. I typically mount in antler so I use a Scandinavian tang shape.
Examples of blades made on my jig:
A finale note I would like to share regarding this jig concept is the profound effect it has made on my freehand knife making. It has steadied my hand and given the proper example of thorough steady grinding required to make a nice functional knife. Now when a roughly forged blades is needing an edge but does not fit on the jig I can easily achieve a nice uniform convex/scandi edge with great success>
Example:
I hope this will help on the road to better knife making, it has helped me greatly in my own progress and has redefined my art form in many ways.
Scandinavian Bush Knife. 1075/1080 blade steel with oil quench.
The Bush knife above is my first under my VISBJORN Forge name and the first Vinlander 1.0 although the design will likely include a stag handle after this prototype.
I used a Jig to get the edge bevel and I will be doing a very detailed post on who invented the jig originally (With links) and how I made my own version and added my own custom details for what I do. I do not know how I lived with out it before so I look forward to sharing my results and modifications in the future. I will also be doing a Gear overview post to show what an evolving home knife shop might have in it and how you can have a serious shop right in your own shed.
I think I went over general safety in a previous post but I will do a safety bullet points right now to refresh.
1. Always wear goggles for grinding and darker glasses for forging. The white spot in the forge can be damaging to the eyes like the light produced by welding..
2. Gloves are needed while grinding to prevent burns and getting caught by the paper/wheel.
3. Hearing protection should be used for any prolonged use of power tools.
4. Always wear a good dust mask while grinding. VERY IMPORTANT.
5. if you use German silver (cupronickel) or nickel in your work whether jewelry or knife accents please be aware the dust is very toxic and should be avoided at all costs.
6. Please see previous posts for blacksmithing tips on hammer holding etc.
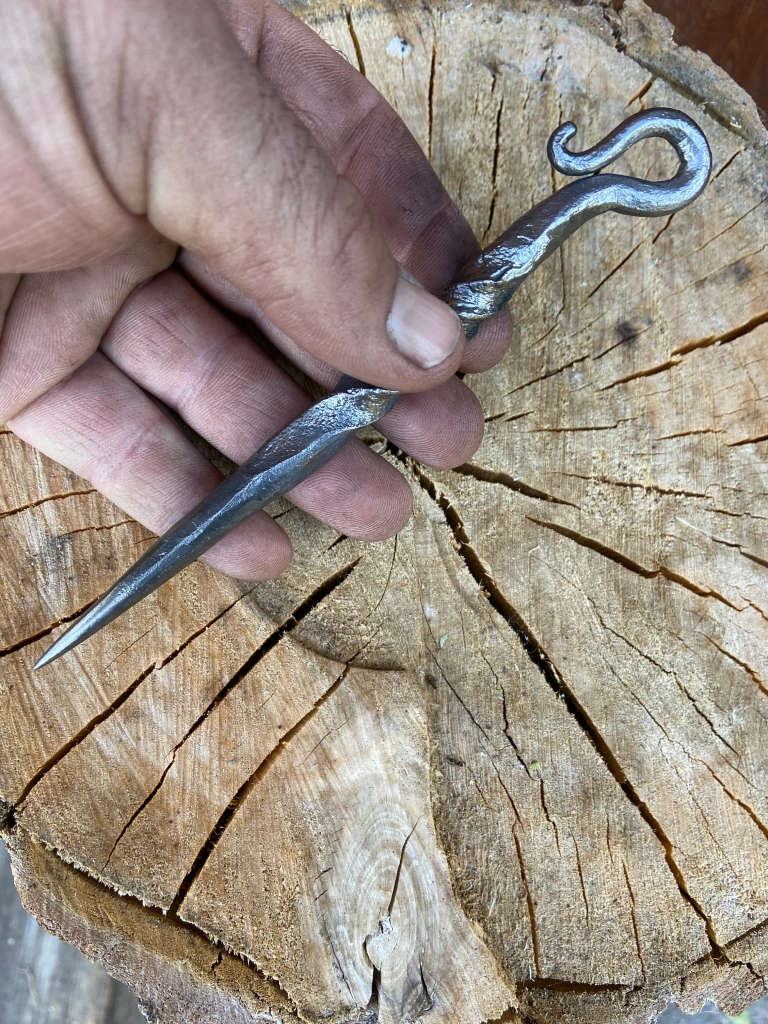
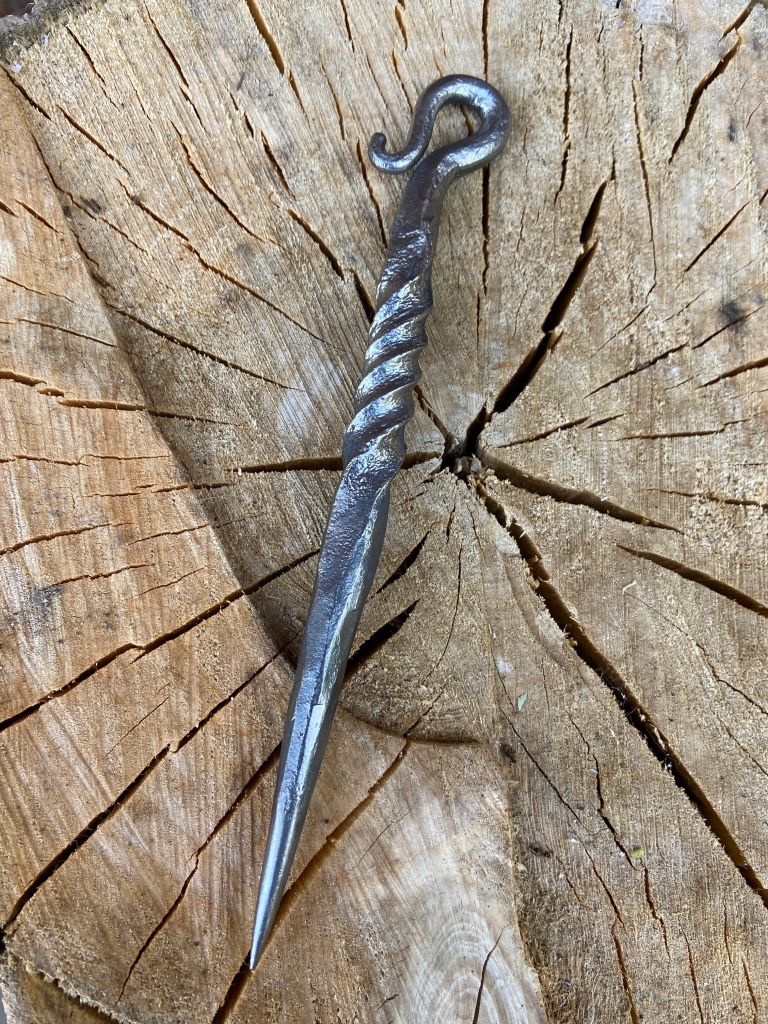
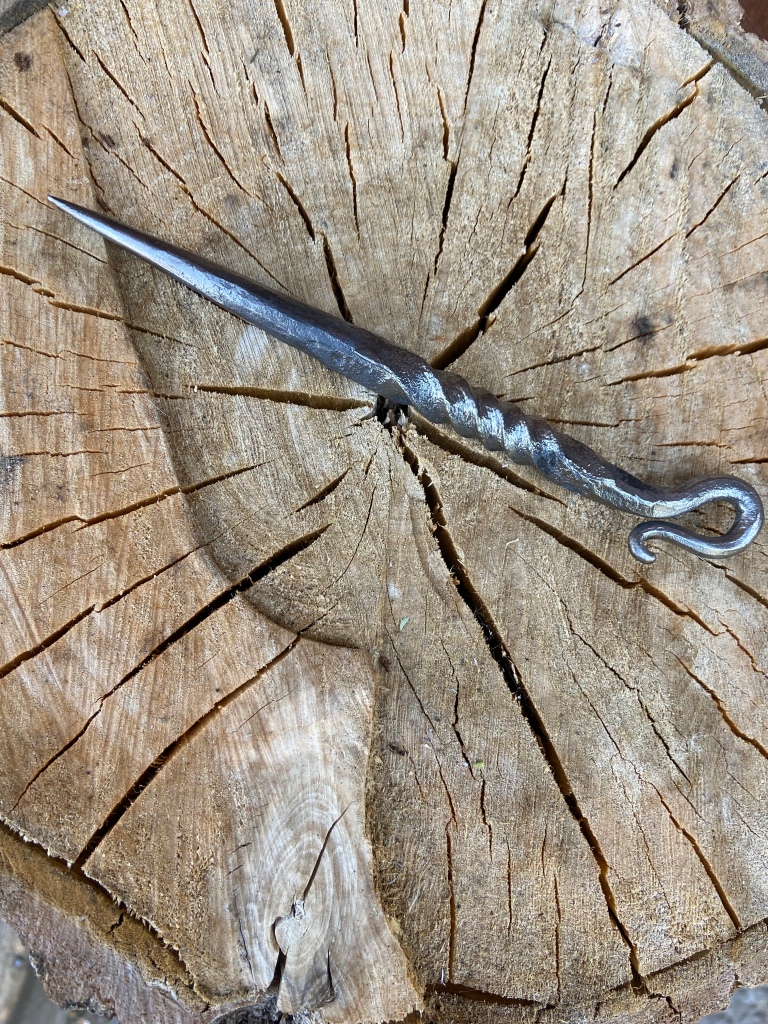
Forged 40 grade Rebar. Very well hardened. Currently used as a utility knife.
Knives like the ones shown above are really why I stay creative and inspired to be a blacksmith. I love to dive into doing solely artistic pieces to refresh my mind and get inspired to keep working and progressing. If you ever feel trapped in by conventional knife making I do urge you to grab a slab of iron and forge something just for the enjoyment and creative process.
The Rebar utility knife I simply made for myself as a leather working tool, I got lucky with a piece of HC 40 grade and its turned into a great little knife I use all the time and its holds its edge as good as any store bought knife I have had.
Stay inspired and keep pushing your creative boundaries.
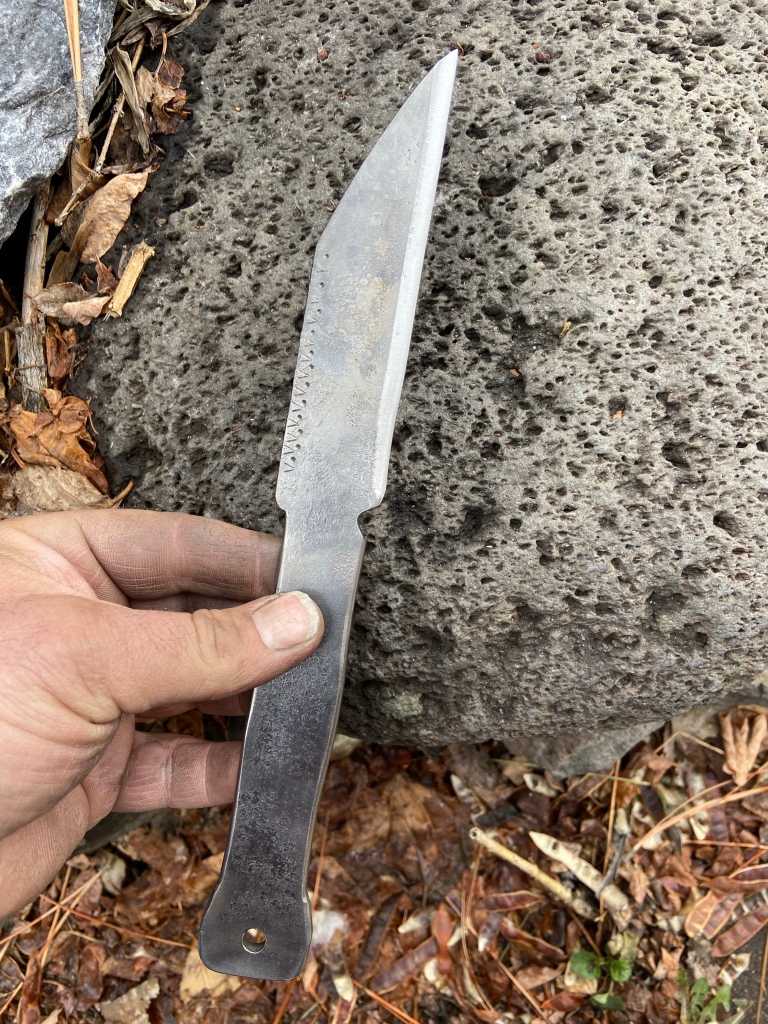
New post!: its been awhile and I have been thinking of what I wanted to post and I decided to talk a bit about unorthodox knife edges and how they improve or atleast living up your creations. The knife above is a D-2 tool steel Starcke T1-5 Seax or Tactical Seax (Copyright Norsewest Industries 2011) The knife has a rather radical cutting edge in that is has only one bevel and the opposite side is flat ground. This allows the user to maintain the edge almost exclusively with a steel. I myself was skeptical having seen similar ideas in pocket knives with less than stellar results! but when I finished this version 1.0 prototype I was shocked how proficient the edge was and how truly sharp the knife is with a single sided bevel.
As you can see the side 2 shot notes the straight angle with no bevel. By using the Seax design it allows a perfectly straight cutting edge with no awkward to sharpen angles. Combine this with the single side bevel and you have an easily maintained Bushcraft knife with modern and ancient designs. So far this design has managed to make mince meat out of 3/4 inch rope, leather, vinyl, fabric and wood with total ease, so I recommend you think more creatively about your edging and have fun experimenting with new angles and applications to your knives.
Experimentation is a good thing in any craft or art form and without bold new directions and ideas no art form can survive. Always have fun and bring your best intentions into the workshop. Hope this inspired some out of the box Knife or any kind of metal crafting. stay tuned for new Starcke and Greenlandr Bush knife experimentations/ideas in design.
There is no question that for thousands of years antler has been the best possible natural handle material available for knives. It is durable and weathers slowly unlike wood which can be destroyed by variations in temperature and humidity when Antler is almost not effected at all. To this day Neolithic antler tools are still found intact.
I will list here my own personal tips and suggestions for your gear when out hunting for antlers in the wilderness.
GEAR:
Reliable belt knife/Folding knife.
Sun glasses.
Cantene/Water bottle.
Twine for tying antlers together or to your pack.
Garbage bag.
Granola/Energy bar.
Hat.
Cellphone.
ANTLER HUNTING BULLET POINTS:
1. Start by studying where the deer herds are and how they migrate in your area.
2. Get an idea of how many male deer there are per herd. Some herds can have 7-8 males or more.
3. Hike into the hills/wilderness and look for heavy traffic areas and established game trails.
4. Dark droppings mean recent activity and lighter means older migrations.
5. Avoid heavy foot traffic trails and horse riding areas. Any horns may already be found.
6. Hunt from late February to late April for best finds.
7. Hunt 20-30 feet or more around trails .
8. Search under large trees, flat fields, forested glens and remote hill sides. Round top hills are also great places to hunt.
9. Areas with notable human activity such as gun shells or bottles may be more difficult to hunt and find antlers.
10. be aware of whose property your on.
11. The more remote the area the better.
12. Matching antlers are rare. I have only found two matching sets in one spot twice.